![]() Most dive instructors (and their training agencies) will tell you it’s unrealistic to expect beginning divers to master much in the way of buoyancy control. That, in order to achieve even a modest degree of control over buoyancy, students really need to enroll in a Buoyancy Control Specialty Diver course immediately upon certification. We’re here to tell you that’s bullshit.
Most dive instructors (and their training agencies) will tell you it’s unrealistic to expect beginning divers to master much in the way of buoyancy control. That, in order to achieve even a modest degree of control over buoyancy, students really need to enroll in a Buoyancy Control Specialty Diver course immediately upon certification. We’re here to tell you that’s bullshit.
There is absolutely no reason why the average beginning scuba student can not only graduate with a high degree of control over buoyancy, but demonstrate that ability right from the first confined water session.
Think we’re blowing smoke here? Well, let us put our money where our mouths are. Take a minute and look at this video showing two of our recent Open Water students. This was shot the week David and Kristen were certified:
There are several things you should have noticed while watching this video:
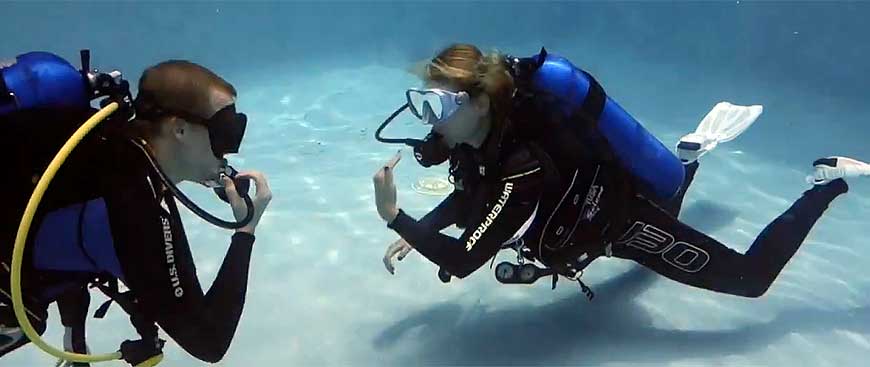
- At no point do David or Kristen ever stand, sit or even kneel on the bottom. In fact, there isn’t a time when they are not maintaining neutrally buoyancy and horizontal body position.
- Not only do you not see David or Kristen performing counterproductive skills such as fin pivots and Buddha hovers, they have never needed to do anything so ridiculous in order to learn buoyancy control.
- Both David and Kristen can perform essential skills such as regulator recovery and clearing, mask clearing and air sharing while maintaining neutral buoyancy. This is important because if they were to experience, say, a mask flood while 80 feet down on the Palancar wall, there is not going to be a training platform nearby they can kneel on.
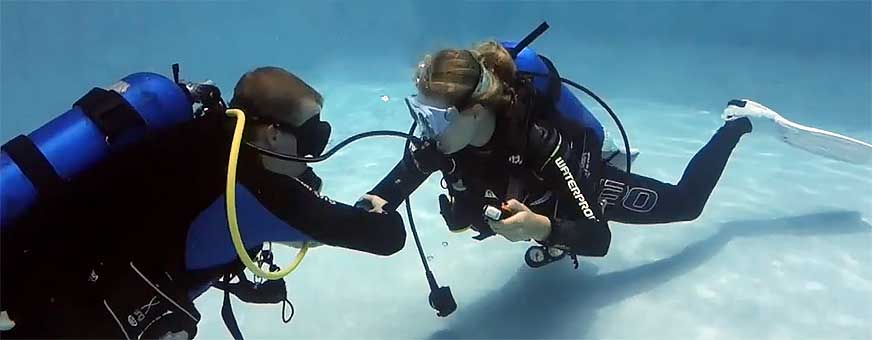
- Notice that, at the end, David and Kristen are not only able to initiate an air-sharing ascent while neutral, they can begin that ascent without ever adding air to their BCs or kicking to the surface. It’s all breath control.
Do your students look like this? Do you wish they could? Well, they can — and it’s easier than you may think.
The catch is, you have to be willing to completely abandon the way scuba was taught during the last century.
Instead, you are going to have to start teaching real buoyancy control. There are four keys to doing so, and we are going to tell you what they are.
1 Make neutral buoyancy a habit, not a “skill”
No one has to tell you that it’s better to simply develop good habits from the start, than to have to unlearn bad habits later. Unfortunately, the traditional approach to teaching scuba reinforces one of the worst possible habits any diver can have. That is, being constantly in contact with the bottom.
In a typical beginning scuba course, buoyancy control is treated like a “skill” — something students practice sporadically through counterproductive exercises such as fin pivots and Buddha hovers. Most of the time, however, they just stand, sit or kneel on the bottom. Think about it:
- Would you allow students to get in the habit of constantly putting their masks on their foreheads? Of course not.
- Would you allow them to get in the habit of leaving tanks standing unattended or not exhaling when a regulator is out of their mouth? Not likely.
- Would you allow students to stand on fragile coral, kneel on delicate plant life or sit on a sea turtle? Oh, wait…that is effectively what you are conditioning students to do every time you allow them to stand, sit or kneel on the bottom.

The only way to effectively teach buoyancy control is to make it like breathing continuously or equalizing early and often on descent: A habit students develop from the very onset, and continue to practice without being told specifically to do so.
Now, if you’ve never taught this way, you are most likely thinking, How in Hell are you supposed to do that?
Relax. We’ll explain it all shortly.
2 Teach the Five Elements
How often have your heard this?
“My buoyancy sucks. I never know which button to push or when to push it.”
That, right there, underscores the problem with the traditional approach to teaching buoyancy control. Students leave class with the impression that it chiefly involves pushing buttons on a BC. And, while they may have done an exercise in which they supposedly demonstrate proper weighting by “floating at eye level,” they never have the opportunity to make the connection between proper weighting and overall control of buoyancy. (The role breath control plays never even comes up.)
The fact is, BC use is just one element of buoyancy control — and while it is important, it is no more so than the other four elements.
The complete list of elements includes:
- Balanced equipment
- Proper weighting
- Breath control
- BC use
- Personal involvement

Let’s take a look at each.
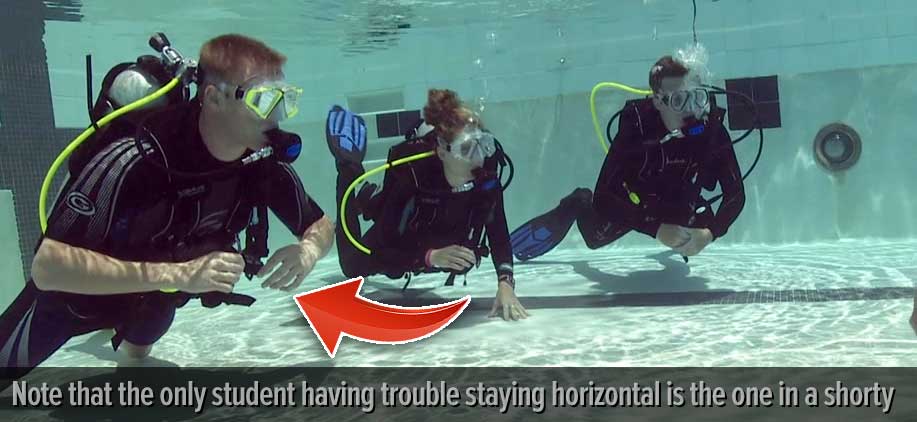
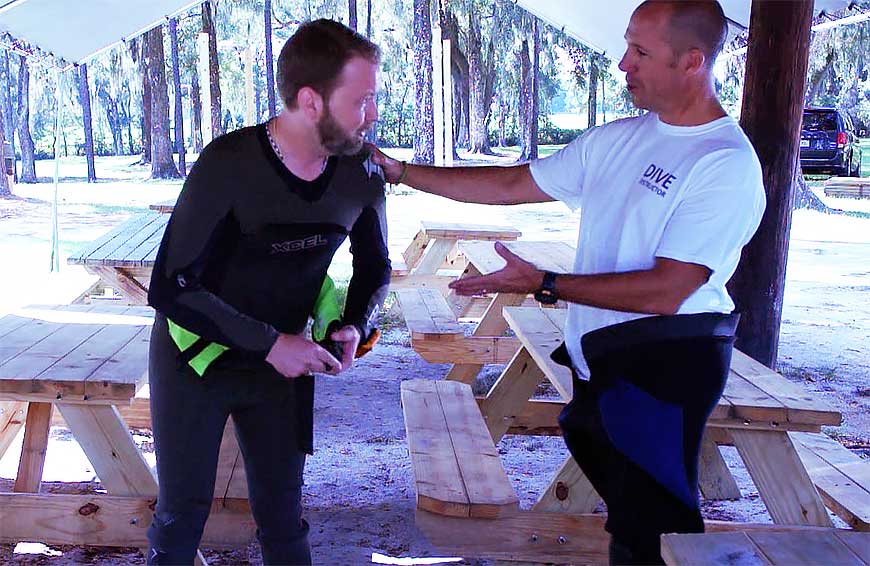
Balanced Equipment: It is extremely difficult — if not downright impossible — to learn to control buoyancy if your feet are constantly sinking. Horizontal body position is a critical part of the overall equation. Unfortunately, most students learn to dive in equipment that all but guarantees their feet will remain firmly planted on the bottom. The chief culprits are wetsuit tops or shorties and weight belts.
- Wetsuit jackets or shorty wetsuits add lift to the upper portion of the body, while providing no lift for the legs.
- Weight belts concentrate ballast below most divers’ natural balance point. The more weight students wear on their belts, the more their feet will sink.
Of all of the changes stores and instructors need to make in order to teach real buoyancy control, this is the most challenging. Why? Because it’s the only change that may involve spending money.
Full-Length Exposure Protection: Let’s start with the issue of exposure protection. You probably don’t relish the thought of running out and buying several full-length, 3 mm jumpsuits for the pool…or exposing your thicker open-water rental suits to all the additional wear and chlorine. Fine. Don’t.
Many dive centers do not provide students with any exposure protection for the pool. In some cases, this is because they are fortunate enough to teach in a pool that is very, very warm. In other cases, it’s because they encourage students to invest in a warm-water wet suit of their own. In so far as these suits are fairly inexpensive, and nearly all divers do at least some warm-water diving every year, this is a good investment.
From the standpoint of buoyancy, it doesn’t matter if students are in a full-length suit or no suit at all; they find it easier to maintain good trim and body position in either case. Problems only arise when wearing just a wetsuit top or shorty. That is when their upper body rises and their feet tend to sink.
Weight-Integrated BCs.: If the BCs your students currently learn on can only be used with weight belts, you need to get rid of them as soon as you can afford to and replace them with weight integrated models. This is for two reasons:
- You owe your students the opportunity to learn on the type of BC they are most likely to buy and, for the past two decades, that has been weight-integrated models — by a very, very wide margin.
- Because weight-integrated BCs concentrate ballast in line with a diver’s natural balance point, they make it vastly easier for students to maintain good body position and trim.
Dive center owners and instructors can give you all sorts of reasons as to why they should not put students in weight-integrated BCs — virtually all of which won’t stand up to scrutiny. For example:
- ”Most rental BCs aren’t weight integrated; therefore, if I don’t teach my students in weight belts, they won’t know how to use them.” Remember that the reverse is true as well. If you don’t teach students in weight-integrated BCs, they won’t know how to use these, either. Not only are weight-integrated BCs what your students are most likely to buy, they are becoming increasingly common in rental. Bear in mind, you can still show students who are using weight-integrated BCs what weight belts are, how to set up and use them properly, and how to remove them in the water. You can also set some time aside for students to actually practice using them. However, unless you put students in weight integrated BCs, they will never have the opportunity to learn to use them correctly.
- ”I don’t want to risk losing weight pockets out of my rental BCs.” But you are okay with losing weight belts? This one doesn’t hold water, either. A Midwest dive store I ran has had weight-integrated BCs in rental for over 15 years. In that time, they have only had students lose two weight pockets. One was quickly found; the other the student replaced, without quibbling, because he know going in he would be responsible if that happen.
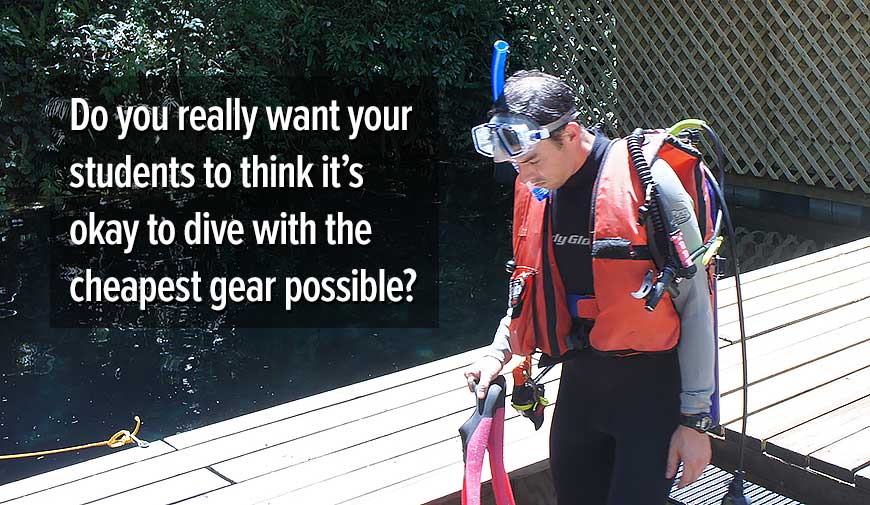
- ”Weight-integrated BCs are too expensive to put in rental.” Now we get to the real issue: Saving money. Many dive stores purchase the cheapest equipment they can find for rental. This applies not only to BCs, but to regulator systems as well. It’s false economy. When you put students in cheap equipment, you are in essence saying, “You don’t need to own equipment that’s any better than this.” And once you get students thinking cheap, you increase the likelihood they will buy their equipment on line in an effort to save even more money. Quality rental gear is a good investment. Not only does it stimulate sales and help students learn better, you can generally turn it over every year or two for as much or more than you paid for it.
- “I’m already having students buy their own weight belts and weights. I don’t want to lose those sales.“ Great…don’t. If you do business in the southern part of the country, where nearly every diver does at least some local diving, it makes sense for divers to own their own weights. And even in this era of weight-integrated BCs, it’s still a good idea for every diver to own and travel with his or her own personal weight belt. That way, if they lose a BC weight pocket on a trip, they will have something familiar to fall back on. (You might, however, want to avoid selling students bulky, pocket-style weight belts which don’t travel well. Sell them a simple, two-inch webbing weight belt and have them put the money they save toward a dive computer or wet suit.)
Proper Weighting: Among the most common questions I got as a dive boat captain was, “How much weight do I need?” My response was always the same: How the Hell would I know? Didn’t your instructor teach you how to weight yourself? Unfortunately, the typical scuba student is not taught proper weighting.
- They start their first confined-water session with an arbitrary amount of weight their instructor simply gives them. All the instructor seems to care is that the student has enough weight to stay firmly planted on the bottom while doing skills.
- Later on, there may be an exercise in which students are supposed to demonstrate “proper weighting” by floating at eye level. Again, it will most likely be the instructor who determines this. Student involvement is minimal.
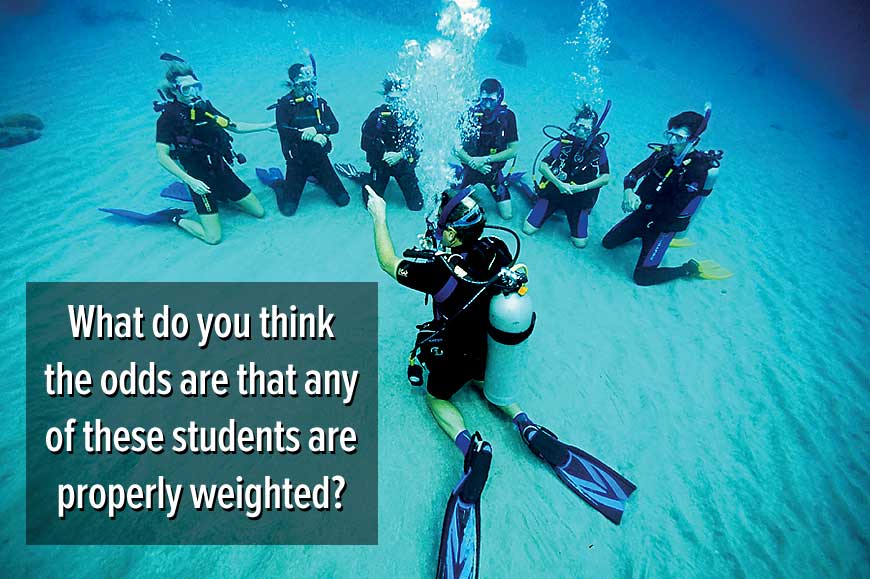
The down side of this is that students quickly get in the habit of being overweighted. Wearing too much weight becomes what feels “normal.” They learn that, to descend, all they need to do is vent enough air from their BCs so that they start sinking like a rock.
This problem is further compounded when students go to open water. Typically, the “proper weighting” exercise gets repeated at the beginning of the first dive. As students are generally wearing thicker wet suits, this may be the first time they actually have something remotely close to the right amount of weight.
Unfortunately, at this point, when students try to descend, they are stymied by the fact they no longer instantly sink. (Had they been properly weighted in confined water, they would know to exhale fully after venting their BCs.) In response, the instructor starts throwing extra weight on them until they can, again, sink like a rock.
Open water is where many students first have to deal with the increased compressibility of thicker wet suits. This is challenging enough when students are properly weighted. When students are overweighted, this becomes significantly more difficult.
Learning to control buoyancy while overweighted is like trying to learn to ride a bike using a unicycle instead of a normal bike with training wheels.
Part of making buoyancy control a habit (and not a “skill”) is getting in the habit of being properly weighted from the onset. Equally important, you need to make students active participants in the process. Doing so not only underscores the importance of proper weighting, it helps make learning to weight yourself a viable part of every diver’s skill set. (More on how to do this shortly.)

Proper weighting is the very foundation of good buoyancy control. Students who are egregiously overweighted will have difficulty taking advantage of the other elements of buoyancy control, including BC use.
By the way, where properly weighted divers will float at the beginning of a dive depends entirely on factors such as the compressibility of their exposure suits and the weight of the air they will use during the dive. To perpetuate the myth that this will always be “at eye level” shows just how out of touch some of the major training organizations are.
Breath Control: Even if not consciously aware of it, most experienced divers have an innate understanding of the role breathing plays in controlling buoyancy. Basically:
- When you breathe more deeply, you temporarily become more buoyant.
- When you breathe less deeply, you temporarily become less buoyant.
Most CCR divers will tell you, “I never realized how much I’d come to rely on breathing as a means of buoyancy control until I started using a rebreather and was no longer able to.”

Unfortunately, breath control is not normally a part of entry-level diver training. The closest most students get is during ill-advised “fin pivot” exercises, when they get to see the effect breathing has on buoyancy — but not how they can use it as a tool.
The bottom line is, breath control is every bit as essential an element of buoyancy control as proper weighting and BC use. And, yes, you can integrate it into the earliest stages of confined water training.
We’ll go into how in just a little bit.
BC Use: There is no denying that BC use plays a vital role in compensating for exposure suit compression at depth. However, as we said going in, its overall role in buoyancy control is less than many divers realize, and secondary to proper weighting and breath control.
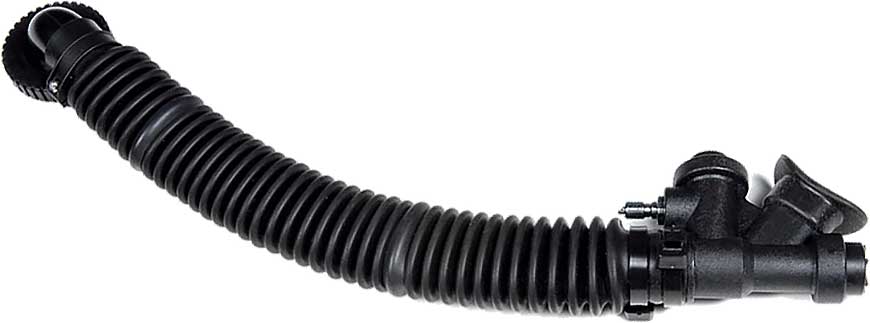
At the end of this article, we’ll take you through the step-by-step procedure we use to teach buoyancy control to our own students. What you will see is that it doesn’t need to be anywhere near the production the major training agencies have made of it.
Personal Involvement: To paraphrase comedian Ron White, “Your buoyancy isn’t going to control itself.’ It requires your active participation.

More importantly, you need to be proactive rather than reactive. In other words, you need to act before you begin sinking out of control or rising to the surface.
Just remember, when it comes to buoyancy control, you are the all-important “Fifth Element” — even if you don’t look like Milla Jovovich.
3 Have students master the Three As
Despite the fact it’s not the sole element in buoyancy control, BC use is important — and the aspect of controlling buoyancy that many students find most challenging. You can increase students’ understing of BC use under water by teaching them the Three As.

What exactly are the Three As?
- Awareness: You need to be constantly aware of your surroundings so that they provide you with an immediate visual warning that you are changing depth.
- Anticipation: If you become aware that your depth is changing, you need to anticipate the need for a possible buoyancy adjustment by locating and holding on to your BC’s inflation/deflation mechanism. This will help prevent you from wasting time by having to hunt for it later.
- Action: If you find yourself rising or sinking to a degree that is greater than you can manage through breath control, you need to act by adding or venting air from your BC as needed to maintain neutral buoyancy.
The best way to master the Three As is through practice. That is why it is important to keep your students off the bottom, and instead keep them swimming, stopping and starting while changing depth.
4 Enforce the Three Rules
You already know that standing, sitting and kneeling on the bottom are three of the worst habits students can get into. You can help reinforce better behavior by establishing and enforcing the Three Rules, much as you have rules about “no masks on foreheads” and “no tanks left standing upright.”
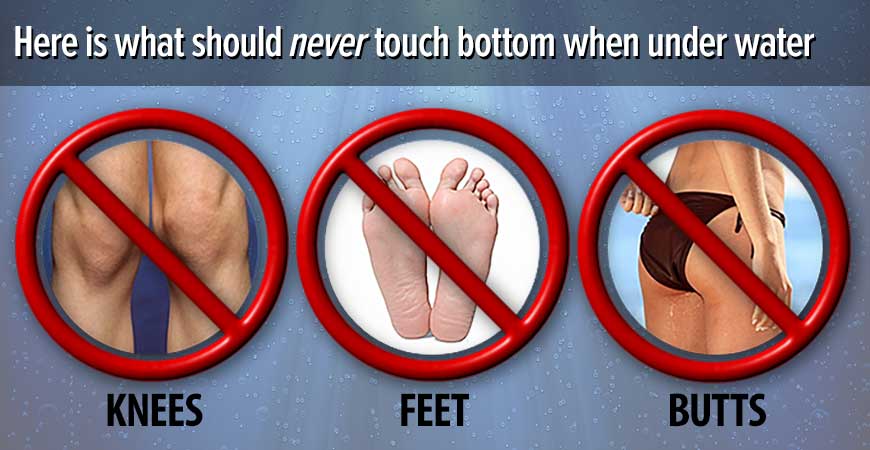
The Three Rules refer to the three things that should never be allowed to touch bottom when your students are under water. These are:
- Knees
- Feet
- Butts
This is not to say your students can never be in contact with the bottom. Sometimes, doing so is necessary to maintain stability while practicing skills such as mask clearing and regulator recovery. The preferred method for doing so, however, is for students to rest gently on just the tips of their fins and, if necessary, their fingertips — while remaining in as close to a horizontal position as possible.

This best mimics the type of behavior we want divers to exhibit in open water: Always horizontal. Always able to monitor what is going on beneath them.
Putting it all together
Do you know the difference between a skill and an ability?
- Mask clearing, regulator recovery and similar tasks are all skills — components of the larger task we call being able to dive.
- Buoyancy control is an ability — something that integrates several component skills, such as proper weighting, breath control and BC use.
If you want your students to get in the habit of having their buoyancy perpetually under control, you will need a strategy for introducing the component elements in a way that makes it easy for students to follow along while expanding their abilities.
There is, of course, no one “right” way to do this. Any of a number of different strategies may be successful. Nevertheless, if the concept of teaching real buoyancy is new to you, you will most likely want a starting point.
Here is the methodology we follow in our classes. As you saw in the earlier video, it works for us, and has for the past 20 years.
Pre-dive visualization
To use BCs effectively under water, students need to have a clear mental picture of where their BC’s various dump valves are and how they need to position themselves in order to vent air successfully.
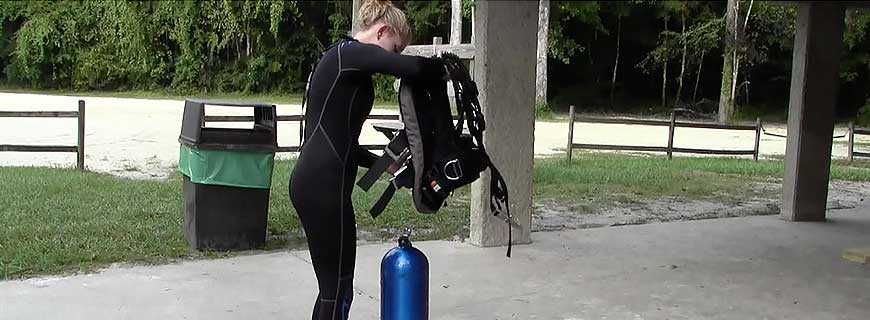
A good time to establish this is when students are assembling their scuba units for the first time.
- Before students ever put a BC on a tank, have them partially inflate it and hold it up in front of them.
- Show students where each of the various dump valves are and how they work.
- Next, have students hold the BC in a vertical position, simulating its orientation when divers float on the surface. Have the students tilt the BC in various directions, simulating how they would need to orient their bodies in order to effectively vent all the air from the BC. Explain that, to be successful, the chosen dump valve must be the highest point on the BC.
- Now have students tilt their BCs forward, simulating the position it will be in when they are swimming horizontally. Again, have students tilt the unit in various directions to see how they will have to position themselves to effectively vent air while under water.
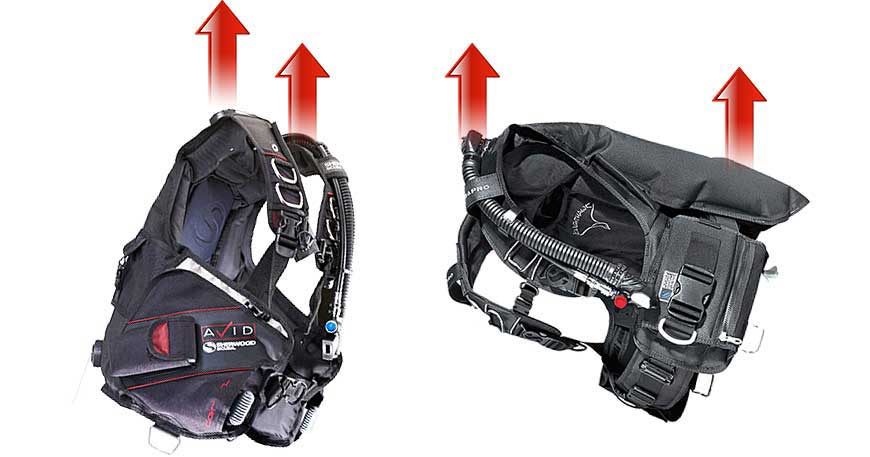
- Finally, have students tilt the top of the BC downward, simulating its position during a head-down descent. Explain why divers cannot use the uppermost dump valves to vent air while in this position. The only option is to either use the rear dump or return to a more horizontal attitude.
While BC inflation/deflation controls can vary widely by make and model, the one thing common to nearly all BCs is the ability to vent air using the large-diameter inflation/deflation hose. Demonstrate and make sure students see that merely holding the inflator up and pushing the oral inflation button is not sufficient. The inflator mechanism must be above the point at which the hose joins the BC air cell for this method to work.
This may also be a good time to demonstrate how each BC’s weight pockets function so that students will be able to load them later on.
Proper weighting
Let’s start by dispelling some of the most common myths associated with teaching proper weighting.
- Properly weighted divers float at eye level: We already addressed this one. Proper weighting depends on too many variables to be able to say this applies to all divers under all circumstances.
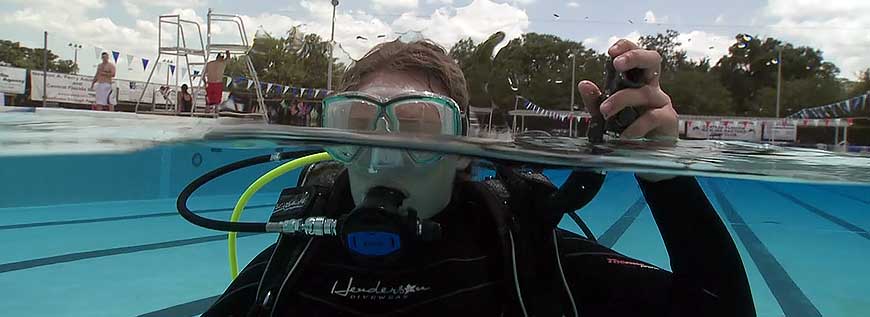
- Students need to be slightly negative so that they stay firmly planted on the bottom while doing skills: Not only is this unnecessary, it merely serves to get students in the habit of being overweighted.
- Instructors need to wear extra weight so that they can hold students down: This one is pure bullshit. As an instructor, you need to be able to exhibit role-model behavior at all times. This includes being weighted for neutral buoyancy. Remember that, thanks to breath control, if you really did need to hold a student in place, a single, deep exhalation can instantly make you up to five pounds negative. Bear in mind also that trying to keep a panicky student from going to the surface only serves to heighten the panic.
So what is the right amount of weight for students? Whatever it takes to make them neutrally buoyant in shallow water with no air in their BCs. No more. No less. As already discussed, among the worst things you can do is simply give students a seemingly arbitrary amount of weight to wear, without actively involving them in the process. To fully understand and appreciate the process of determining how much weight they need, students need to do this themselves.
To start, students will need to have access to weights in a variety of sizes, so that they can find exactly the right amount of weight to use.
We provide each of our students with a small plastic crate containing two one-pound weights, two two-pound weights and two three-pound weights. If they will be wearing anything thicker than a 5 mm wet suit, we also throw in two four-pound weights.

Doing so allows students to make up any combination of weights, up to either 12 or 20 pounds total.
- Begin by having students don scuba units — without weights — in shallow water. For stability, you will most likely want them to don fins as well. BCs should be completely empty.
- Demonstrate and have students practice breathing from regulators by simply putting their faces in the water.
- Next, demonstrate how to test for proper weighting by putting your regulator in your mouth and “falling” face forward while keeping your body rigid. Students should see you assume a stable position, just below the surface and note that your body rises and falls as you breathe in and out. What they should not see you do is plummet to the bottom.
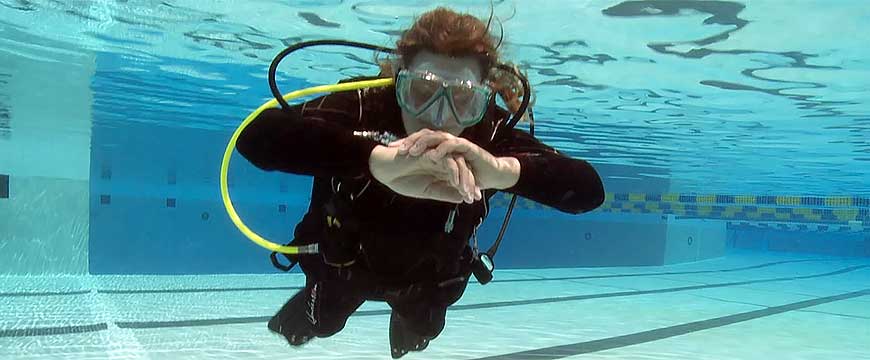
- Explain to students that they are to experiment using varying amounts of lead until they achieve the same result. As with most things, it will probably be helpful if students work in buddy teams; one diver experimenting while the other assists.
- Caution students to keep their feet slightly spread, so that they avoid the tendency to turn turtle.
Rather than waste time loading and unloading weight pockets, have students simply hold one weight in each hand, keeping their hands close to where the weight pockets would normally be. If students are using thicker wet suits, and it is likely they will need more weight than they can comfortably carry in their hands, pre-load the BC with a portion of the likely total, so that students never have to hold more than a five-pound weight in each hand.
- Once each student is satisfied with the amount of weight he or she has chosen, have them demonstrate this to you. It’s okay if the back of each student’s head just touches the surface. What is not okay is a student who can sink to the bottom by doing anything other than a long, deep exhalation.
- If you are satisfied with the result, have students go ahead and load the weight in their BC weight pockets.
Keep in mind that, having gotten this far does not guarantee that students have the right amount of weight. It is, however, a good start and you will be ready to go on to the next skill.
Also, you may be wondering what happens as the session progresses, and tanks become lighter. It’s possible you may have to add weight to compensate for this; however, what we find is that, as the session progresses and students become more relaxed, they breathe less deeply. That’s generally enough to offset the shift in buoyancy.
Breath control
Having done your initial weight check with each student, the next step is to show them that how deeply they breathe can have a significant impact on their ability to control buoyancy. To do this, you are going to have them swim in slow circles in shallow water, while breathing from their tanks.
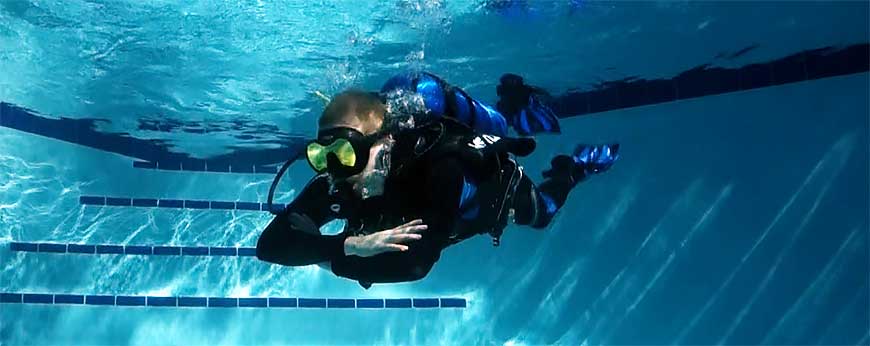
It doesn’t matter that you have not yet covered skills such as regulator recovery and mask clearing. The students are in waist- to chest-deep water. If they have a problem, they can simply stand up.
Don’t be surprised if, initially, students have a little bit of difficulty getting down — and, if they do, do not give in to the temptation to “solve” the problem by simply adding more weight.
What is most likely happening is that, being new to all of the this, your students are excited and breathing more deeply than normal. This will make them more buoyant. To help them overcome this problem.
- Have students exhale fully until they begin to sink.
- Before they hit bottom, have them inhale a partial breath.
- Now have them continue to breathe in a shallow but relaxed manner as they swim.
With each passing minute, your students will become more relaxed — and more comfortable with how varying how deeply they breathe can have a significant impact on their ability to control buoyancy.
The first time you do this, you may be amazed by just how good your students look. Outside of a little hand sculling and a yet-to-be-perfected kick, they will look surprisingly like experienced divers. That’s normal when using this method.
At this point, you’ve really only covered three skills:
- Regulator breathing
- Proper weighting
- Breath control
Yet, despite this, your students are vastly ahead of most others when it comes to controlling buoyancy — and they have yet to even touch a BC. These proper weighting and breath control exercises will most likely take 20 to 30 minutes more than you are used to spending at this point in the course. That’s okay. Doing this now is going to save you considerable time later on.
Having become accustomed to being both horizontal and neutral under water, explain to students that this, with a few exceptions, is what you expect from them for the balance of the course. By the way, even though students have done this initial weighting exercise, it doesn’t mean that they won’t need to further refine their weight needs as the course progresses. Usually, this involves using less weight, rather than more.
Skill performance while neutral
Now you can start introducing skills such as regulator recovery and clearing and mask clearing. You can work on improving their kick as well as any other skills that are well suited for shallow water.
As this may be the first time you’ve taught these skills to students who are neutrally buoyant, you may discover that some students have a tendency to begin floating up when doing skills such as mask clears. This is because, without realizing it, the student is taking a deep breath just before doing the skill.
A solution is to have students hold on to something like a five-pound coated barbell with one hand, while doing the skill with the other. (Your students will also benefit from learning to do skills with just one hand.)
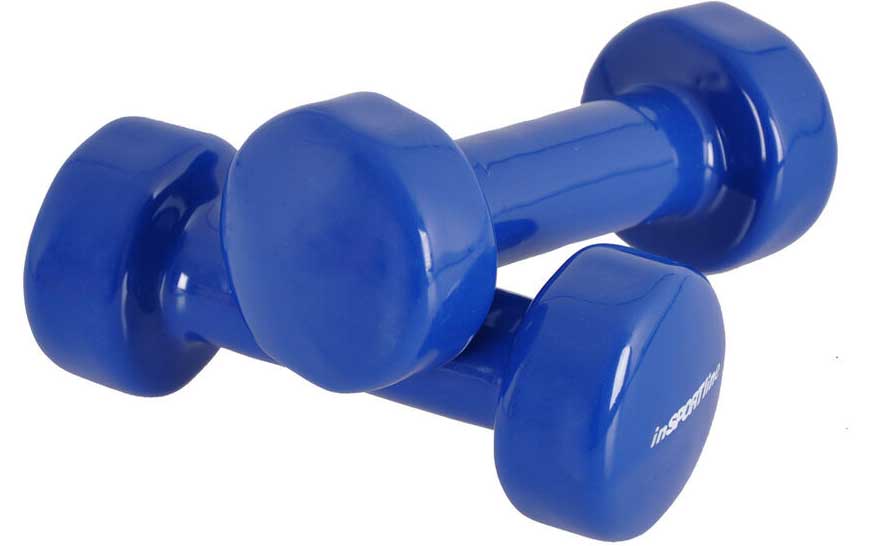
In time, as students become more relaxed and confident in their abilities, they will be able to do skills without any significant change in buoyancy. Remember that, for any skill to be useful, it has to be something students can perform while neutral. The first time a student has to recover a reg or clear a mask in the real world, you can bet their won’t be a training platform to kneel on.
BC use under water
At this point, you may be wondering where “skills” such as fin pivots and Buddha hovers come in. They don’t.
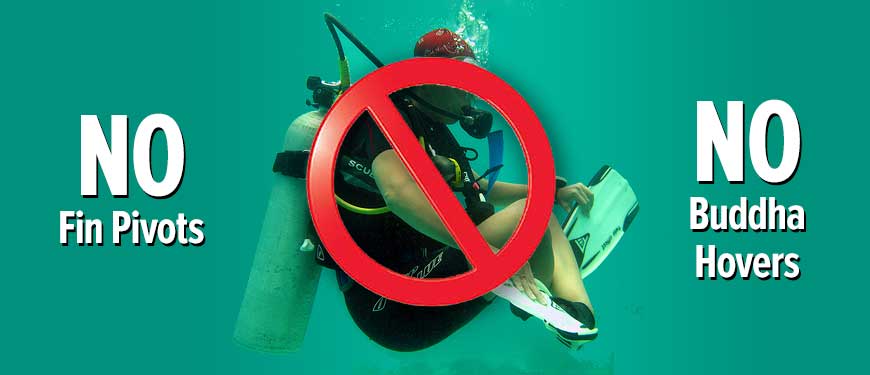
- For one thing, they’re unnecessary. You don’t need a separate hovering exercise when hovering is something students do naturally every time they stop kicking. The so-called “Buddha hover” only exists because most students learn in equipment that is so egregiously out of balance that their feet can’t do anything other than sink when they are neutral. Divers who possess real buoyancy control should have no difficulty hovering while horizontal.
- Similarly, if your students are properly weighted and in balanced equipment, they will not be able to do a “fin pivot.” For one thing, their feet should not be sinking to the bottom. And, if properly weighted, they should rise and fall in response to breathing without having to add air to their BCs in shallow water. Like the Buddha hover, fin pivots are a counterproductive skill that in no way reflects real-life diving.
So, if there are no fin pivots or Buddha hovers, how do students learn to use their BCs under water? That’s easy: They will teach themselves (albeit under your direct supervision).
It’s important to understand that using a BC under water does not have to be difficult. What makes it challenging for most students is the fact they are egregiously overweighted. Thus, instead of just learning to compensate for normal exposure suit compression, they are compensating for the rapid compression and expansion of a giant air bubble that is in their BCs solely to offset the unnecessary weight. As we said earlier, it’s like trying to learn to ride a bicycle by using a unicycle instead of a normal bike with training wheels.
Those of us who learned to dive in the days before BCs all managed to teach ourselves to use them, without a lot of difficulty. The difference was, coming from an era in which you could only control buoyancy through proper weighting and breath control, all we had to compensate for was a minor amount of suit compression.
You can emulate this experience with your own students. Here is how:
- It starts when your students make their first trip to the deep end. When you return to shallow water, ask students whether they noticed a change in buoyancy. Assuming they are wearing even thin wet suits, they should say that they had difficulty staying off the bottom in deeper water.
- Now ask what it is they need to do in order to compensate for this. Students should know from previous study that the answer is adding air to their BCs.
Before they can actually do that, however, there is one more skill they need to practice.
No, it’s not adding air to their BCs. Anyone can do that; all you need to do is push a button.
The trick students need to master is how to get air out of their BCs. That’s the more challenging skill.
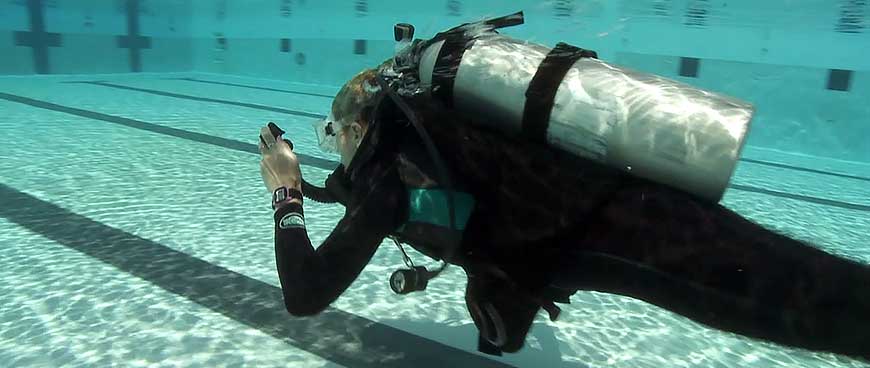
- We will assume your students are still weighted for neutral buoyancy in shallow water. As such, any air they add to their BCs will cause them to immediately start to float up.
- Have students add a very small burst of air to their BCs. As soon as they start to rise, have them tilt their body in the right direction and vent the air. Have them do this repeatedly until they are as comfortable at getting air out of the BCs as they are putting it in.
- The next step is to have students return to deep water. Only, this time, tell them to experiment with adding air in small bursts to maintain neutral buoyancy. Remind them that, when they return to shallow water, they will need to vent any air they have added.
At this point, you may have visions of students shooting to the surface because they overcompensated at depth or forgot to vent their BCs on ascent. Relax, it rarely happens and, if it does, you’ve already had students practice how to respond.
- Have students make repeated trips to and from the deep end until they become comfortable with when and how much air to add to or vent from their BCs.
- Emphasize that, from this point on, you expect them to use their BCs to maintain neutral buoyancy without having to be told to do so.
Moving forward
As we said, even though this approach takes more time going in, it will ultimately save you time, for two reasons:
- You won’t be wasting time on counterproductive skills such as fin pivots and Buddha hovers.
- Because students are more relaxed, they will most likely master other skills both faster and better.
There are a few things worth noting, though:
- A notable exception to the general rule of never standing, sitting or kneeling on the bottom may come when students practice equipment removal and replacement under water. Although an experienced diver can most likely do, say, a scuba unit removal and replacement while maintaining neutral buoyancy, this is a bit much to ask a beginner. In this one instance, it’s okay to vent your BC and make like a rock on the bottom of the deep end.
- Remind students that, when orally inflating a BC under water, they will not notice any change in buoyancy until after they are done blowing into the air cell and have resumed breathing from their regulators. At this point, they can easily start rising and need to be ready to vent air as needed.
- If at all possible, have students spend the final confined water session wearing the same wet suits as they will use in open water. This not only allows you to resolve any weighting issues ahead of time, it gives students the opportunity to become accustomed to the greater degree of buoyancy loss through suit compression they will experience with thicker suits.
The myth that beginning divers cannot excel at buoyancy control is just that: a myth. Teaching real buoyancy control is possible. But you can never achieve it if you cling tenaciously to outdated, 20th Century teaching methods.
Care to leave a comment? Be my guest. Just remember that this is not Facebook. Comments are not public unless I bless them first and, depending on what you say, I may either praise your good judgment or ridicule you unmercifully in front of others.
