![]() Social media can be a great way to share your cave diving experiences with others. It can also be an effective tool for promoting classes, trips and other activities — even if those activities do not involve cavern or cave diving. Unfortunately, most of the cave diving photos and, especially, video we see posted on Facebook, You Tube and Instagram pretty much suck. Which is a shame because they don’t have to.
Social media can be a great way to share your cave diving experiences with others. It can also be an effective tool for promoting classes, trips and other activities — even if those activities do not involve cavern or cave diving. Unfortunately, most of the cave diving photos and, especially, video we see posted on Facebook, You Tube and Instagram pretty much suck. Which is a shame because they don’t have to.
The fixes for the six most common problems are easy and affordable. They are things we learned from master videographer and cave explorer Wes Skiles. If anything, they will be even easier for you to do than they were for Wesley, thanks to advances in light and camera technology that have taken place in just the past few years. Let’s take a look.
1 No POVs…please
The problem: POV stands for Point of View. It’s what results when the camera sees what you would see if you were the lead person in a cave diving team. And while this is a fascinating perspective in person, when you try to duplicate it in photos or videos, the result can be as boring as a bunch of wet rocks.
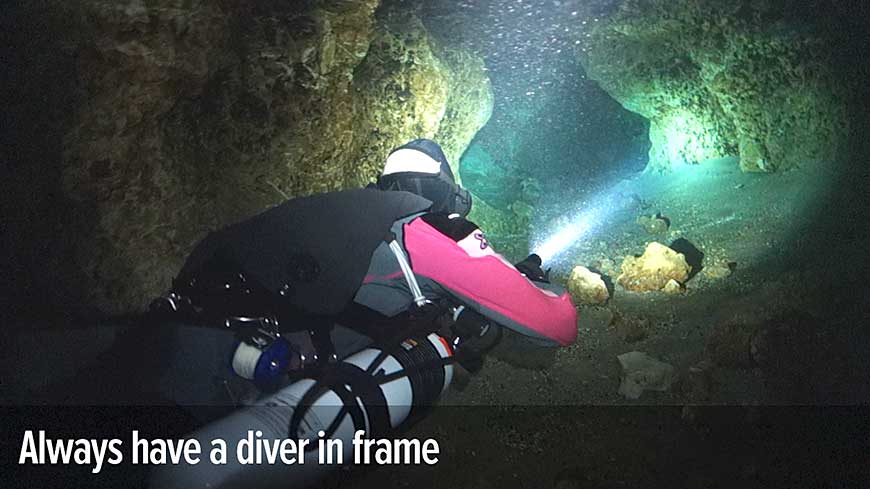
The solution: The easiest solution to this problem is to simply ensure you always have at least one diver in frame. Divers are intrinsically more interesting to watch than rocks are. They also provide the all-important sense of scale, letting your audience see just how big — or how small — the cave really is.
2 Use video lights, not cave lights
The problem: Cave diving lights are great for exploration. Their highly focused, laser-like beams allow us to see down long cave passageways and peek into cracks and crevices. Unfortunately, they make horrible video lights, illuminating just one tiny portion of the frame while leaving the rest in near-total darkness.
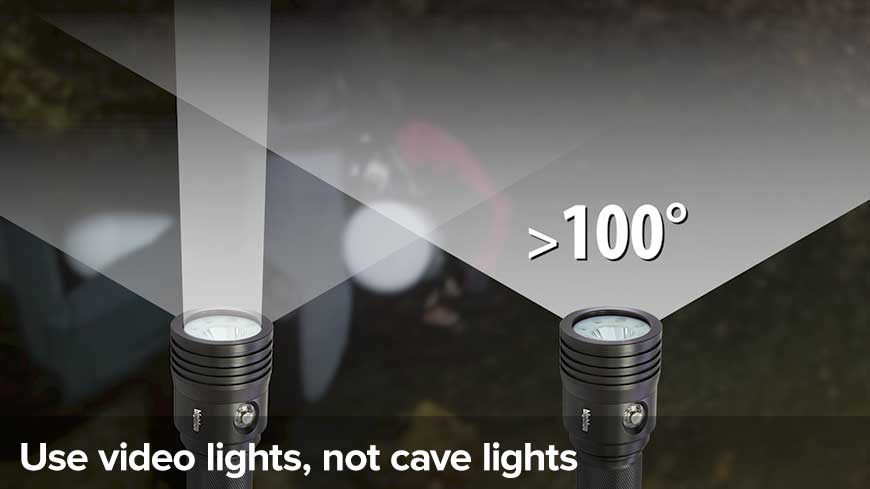
The solution: Whether shooting stills or video, your best solution for lighting underwater caves is to use actual video lights. Their broad, widely diffused beams (typically 100 degrees or more) can help light up the entire frame, rather than just one area.
As we will discuss shortly, using multiple lights helps you create more dramatic effects. Using video lights also helps you better judge what the camera will see before you take the shot.
When shooting with video lights, it’s important to turn your regular cave diving lights off. A single cave light, whether pointed toward or away from the camera, can ruin a shot. When the camera and video lights come out, the cave lights get turned off. Their sole function now will be to serve as props, helping to make your cave divers look like cave divers — despite the fact their lights aren’t actually turned on.
3 Get your lights off the camera
The problem: When shooting in daylight, it’s normal to have all your lights and strobes mounted on arms on the camera. In open water, the function of these lights is to illuminate those areas of the frame the sun cannot. In fact, the art of lighting in open water is to achieve the perfect balance between artificial light and daylight.
In caves, this doesn’t work unless you are shooting at the cave entrance. Without the sun to balance things, your camera-mounted lights end up illuminating just the area immediately in front of the camera, leaving the rest of the cave dark.
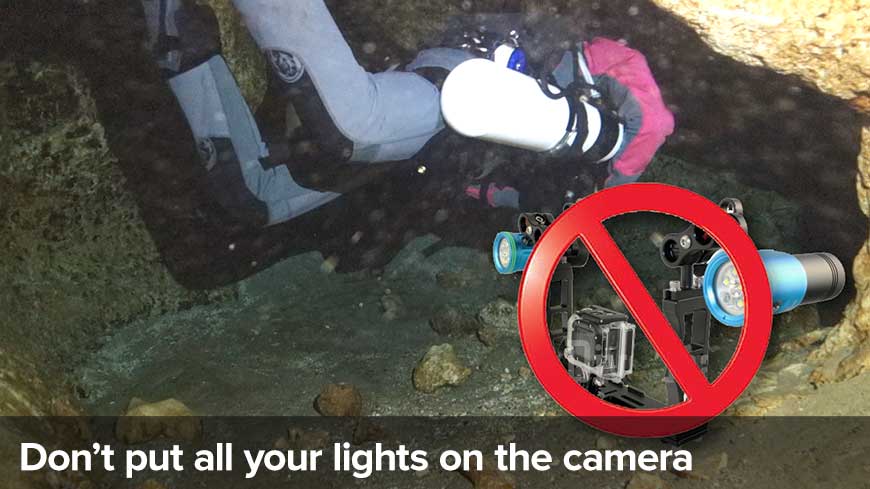
The solution: The only light you really want or need to have on your camera is your smallest video light, which you will use to illuminate any divers or subject matter that is immediately in front of the camera itself. The remaining light or lights should be either in your models’ hands or distributed throughout the cave passageway. This way you will not only illuminate a wider area, but create more dramatic images.
4 Don’t shoot the south end of a northbound fish
The problem: It doesn’t matter how cute your buddy’s butt is under other circumstances, when buried beneath layers of cave gear, it’s downright boring to look at. The worst cave diving videos are those in which all you see is the rear end of another diver swimming away from you.
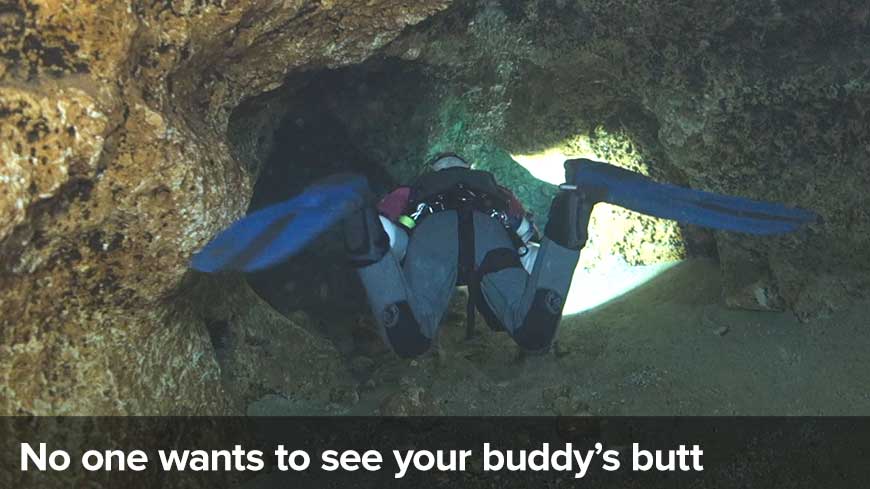
The solution: When shooting stills in underwater caves, your divers should be looking in the direction of the camera (but not staring directly at it). In videos, your divers should be swimming toward the camera, possibly passing by it toward the end of the clip. Doing so is not only more interesting to watch, it lets your audience see divers’ eyes and facial expressions, helping to convey a sense of emotion.
5 Distribute your lights throughout the cave
The problem: Having just a single light source means you will be illuminating just one part of the cave. This can lead to images that appear flat and lifeless.
The solution: The most dramatic lighting effects result from distributing your available lights throughout the cave room or passageway. Doing so adds both depth and a sense of drama.
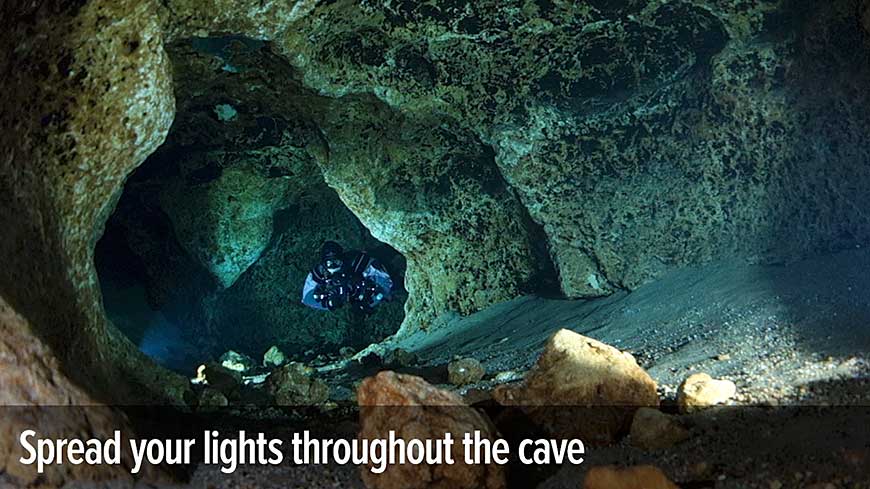
Just as you want to have only your smallest light on the camera itself, you want to make sure your most powerful lights are the ones furthest from the camera. As other lights get closer to the camera, they should be decreasing progressively in power. Due to the physics involved, the apparent result will be a more even distribution of light.
6 Get more than one diver in the frame
The problem: Remember that your cave photos and video will be seen by more than just cave divers — or even divers in general. Yes, you know that, if just a single diver appears in frame, it’s the result of a team of at least two divers working together. As difficult as this may be to believe, that fact is often lost on a lot of people. The last thing you want to do is have to waste time defending yourself on line against accusations that you are “promoting solo diving.”
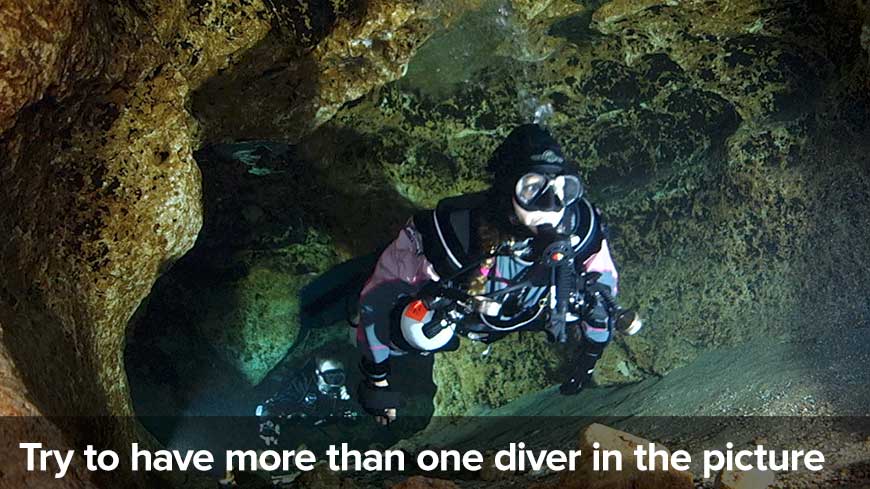
The solution: The easiest way to avoid having to explain the obvious to others is to simply ensure you always have at least two divers in frame. If diving with two or more buddies, this is easy. But what if it is just you and a buddy?
If shooting video — or you can access the timer on your camera when shooting stills — there is a solution. You can just mount your camera on a tripod and let it do its thing while both you and your buddy get in frame. There are any number small, waterproof tripods with bendable legs that are both easy to take with you and adaptable to uneven cave floors. Just be aware that you may need to drill and tap a 1/4-20 hole in the bottom of your camera tray if it does not already come with one.
Learn more
What we have covered here will get you started and can have an immediate effect on the quality of your photos and video. But there is a lot more you can learn as well.
One way is to take advantage of our day-long cave photography and video seminars. We teach these at Ginnie Spring and Jackson Blue, and they are open to any certified cavern or cave diver. We typically work with buddy teams or small groups, but can do one-on-one programs as well.
If you would like to learn more, use this form to contact us.
No Fields Found.